


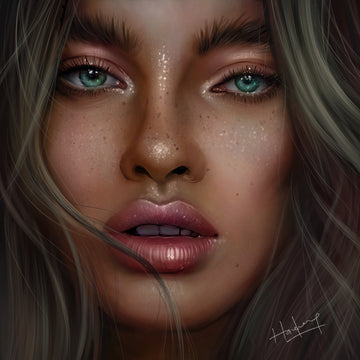

Soft Painterly Portraits in Procreate (Blur & Color Method)
by Haze Long on Jan 16, 2026
What you need
Study the Color First (Not Details)
Start by blocking in large shapes with Nikko Rull and maintaining correct color relationships. Avoid textures & highlights at this stage. Fine tune the edges by erasing or smudging with Fat Spray Brush/Dry Square Brush. If possible, maintain every color at the same value with the exception of lips & irises.

Build Soft Shadows with Simple Shapes
Within every new layer, set it to Multiply blending mode. Paint the same colors you have above to start stacking shadows. Shadows are painted as broad, simplified shapes with the Dry Square Brush, then carved/smudged with the Fat Spray Brush.

Darken Gradually Without Sharpening
Continue adding more layers in Multiply to gradually stack colors into shadows.

Cleaning Up after Sketch Removal
Paint highlights in with colors from the color palette. Focus on getting the contrast you want. Keep highlights diffused.

Use Gaussian Blur to Soften Edges
Apply Gaussian Blur selectively to edges, key planes, and transitions. This helps unify forms and removes unnecessary sharpness early in the painting. Careful not to blur eyelashes, textures or highlights.
Add Chromatic Aberration for Subtle Color Shift
Chromatic aberration is used sparingly on edges and highlights to introduce color variation without adding texture or detail.
Add Sharp Textures
Using sketch brush in the smallest brush size, pencil in highlights, textures and hair.

